Drywall 101: Must-Know Details On Your Wall Texture!
When we reached the drywall phase during our first ever remodel, I was shocked to learn how many decisions I had to choose from just to “wall up” our home. Questions like: How many sheets to order? What did I want my edge detail to be? What level of texture did I want? How could I budget for the wall texture I desired? What’s the difference between drywall and plaster?
This blog post is created to help you understand the basics, so you come prepared when you need to discuss these items with your contractor.
Let’s start with the basics…
What is Drywall?
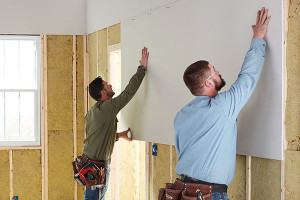
“Drywall is made of the mineral gypsum sandwiched between two layers of paper. It was invented about a century ago to take the place of wet plaster on ceilings and walls. Standard thicknesses are 1/2 and 5/8 inch for walls and ceilings; drywall sheets are typically 4×8 or 4×12 feet” (Source).
Fun Fact: “Sheetrock” is a specific brand of drywall. You may hear you contractor use these terms interchangeably.
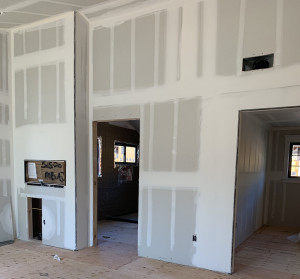
After the drywall boards are mounted to the wall, we use tape to hide the seams between each board. We then use a joint compound texture over the tape, screws and drywall to create a finished look prior to sanding, prime & paint.
In the photo to the left, you can see the vertical seams covered up with tape and mud, sanded down to look like paint strokes!
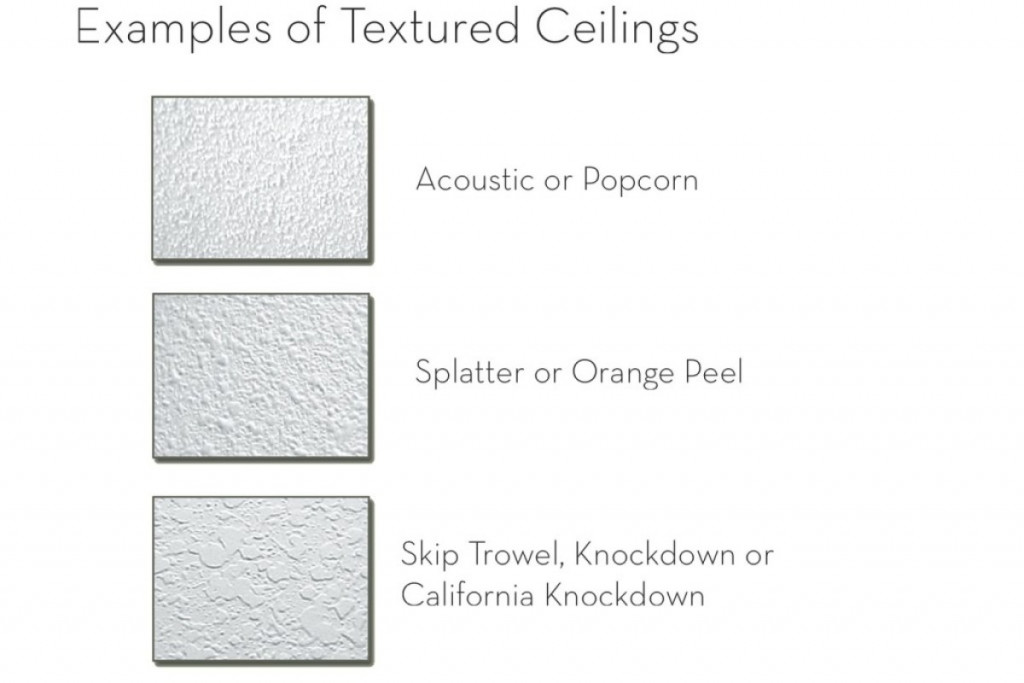
How to Decide Your Texture…
You get to choose the finish texture applied to your walls, but beware, the smoother and prettier the texture, the more expensive the price point. Below are a few examples with names that you have probably seen growing up!
If you want a smooth wall texture, the skim coat is ranked from levels 1-5 to describe the application intensity:
“Level 0 finish means that no finishing has been done and the drywall has just been hung up. It is merely attached to the foundation or infrastructure. A level 1 finish is the most basic level of finish, where the joint compound has been added to the gypsum board. The numbers continue to increase through level 2, level 3, and level 4, with each ranking getting more treatment and with the drywall tape and screws getting embedded in the joint compound. Finally, the drywall is ready for level 5. ” Source.
Level 5 Skim Coat is is the texture I always recommend for the photo finish! It is recommend in spaces where attention to detail is a must, as you do not want to see any discrepancies in your wall texture from the drywall and tape. Level 5 shows off your paint very well!
Made it this far in the post?! Phew! You got this! Just a few more things worth noting…
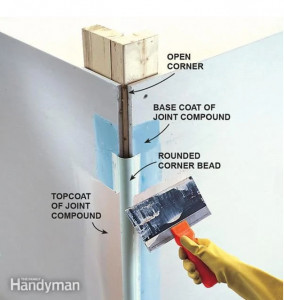
Rounded or Square Corners?
You heard me right, this is the step in the construction process where you can decide if all walls are squared off or rounded, also called bullnose.
To make your drywall corners rounded, simply adhere the bullnose strip to the drywall and tape and texture accordingly. This is a matter of preference, but I personally think the rounded corners add an extra level of interest, warmth and softness to homes here on the West coast.
And last but not least..
Plaster vs. Drywall
Plaster is definitely having a moment right now, just like all things vintage. Plaster provides the old-world feel along with texture and depth. And there is also a reason plaster is considered “old world” as this was the way we closed our walls up before gypsum was invented. Small businesses like Portola Paints have given designers a new tool kit to work with as they have created exceptional Roman Clay and Lime Wash products for homeowners. See what the owners had to say:
“That old-world, chalky patina you find on buildings in Europe and South America is what originally sparked our love of paint,” says co-founder Jamie Davis. “For years, people had been trying to replicate that with faux-painting, but we wanted to create a product that actually was the real thing—you just don’t need a master Italian plasterer to get it.” (Source)
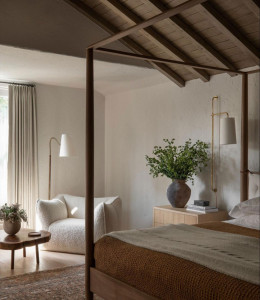
Design by Amber Interiors
We could do an entire blog post on alternative wall textures like plaster, but for the sake of time, we will tell you the pro’s and con’s of plaster and drywall.
Plaster has a higher R-value than drywall, meaning it acts as a stronger insulator than drywall alone, helping to keep your home cool as well as reduce sound traveling through the walls. However, modern day insulation will make your drywall just as productive as plaster.
Plaster also requires a more skilled application, which means the labor price will likely be more expensive than drywall. That being said, plaster is now considered a high-end design decision, so remember that when deciding your wall texture!
Phew! You made it! Have questions about wall texture for your remodel? Drop it in the comments below!
3 thoughts on “Drywall 101: Must-Know Details On Your Wall Texture!”
Great article! I have heard the terms “mud” and “spackle” used when discussion drywalling. Are those the same as joint compound? if not, when would you use them over joint compound?
I’m getting my grandma’s house remodeled this spring, and I need drywalls installed for the project. Thank you for suggesting we consider a Level 5 Skim Coat for the drywall texture if we don’t want any discrepancies on our wall texture since they show off paint very well. I’ll be sure to consider your recommendation while I look for a contractor to hire for our drywall installation soon. https://neatdashllc.com/drywall-1
This spring, I plan to rebuild my grandma’s home, and I need to have drywall done. Thank you for recommending that if we don’t want any differences in our wall texture as they show off paint extremely effectively, we should think about using a Level 5 Skim Coat for the drywall texture. When looking for a contractor to engage for our drywall installation in the near future, I’ll be sure to take your advice into account. https://carveypainting.com/our-services/
 After the drywall boards are mounted to the wall, we use tape to hide the seams between each board. We then use a joint compound texture over the tape, screws and drywall to create a finished look prior to sanding, prime & paint.

Great article! I have heard the terms “mud” and “spackle” used when discussion drywalling. Are those the same as joint compound? if not, when would you use them over joint compound?
I’m getting my grandma’s house remodeled this spring, and I need drywalls installed for the project. Thank you for suggesting we consider a Level 5 Skim Coat for the drywall texture if we don’t want any discrepancies on our wall texture since they show off paint very well. I’ll be sure to consider your recommendation while I look for a contractor to hire for our drywall installation soon. https://neatdashllc.com/drywall-1
This spring, I plan to rebuild my grandma’s home, and I need to have drywall done. Thank you for recommending that if we don’t want any differences in our wall texture as they show off paint extremely effectively, we should think about using a Level 5 Skim Coat for the drywall texture. When looking for a contractor to engage for our drywall installation in the near future, I’ll be sure to take your advice into account. https://carveypainting.com/our-services/